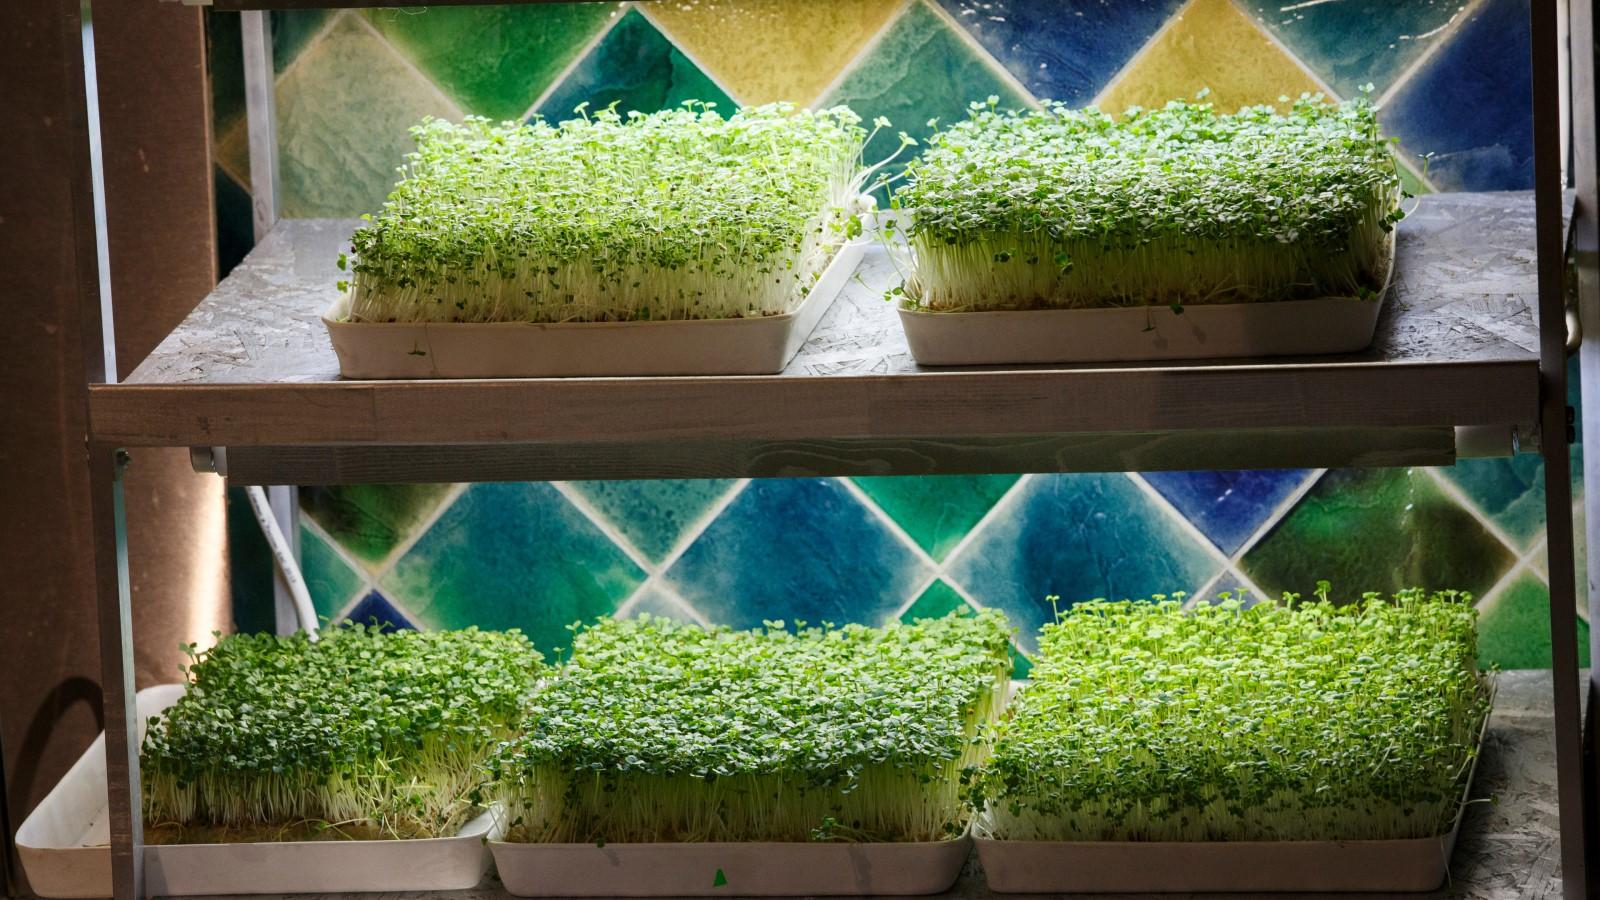
Trays of microgreens (sprouts) on shelves under grow lights. Photo: Adobe Stock
Updated: May 8, 2026
Sprouting young vegetables
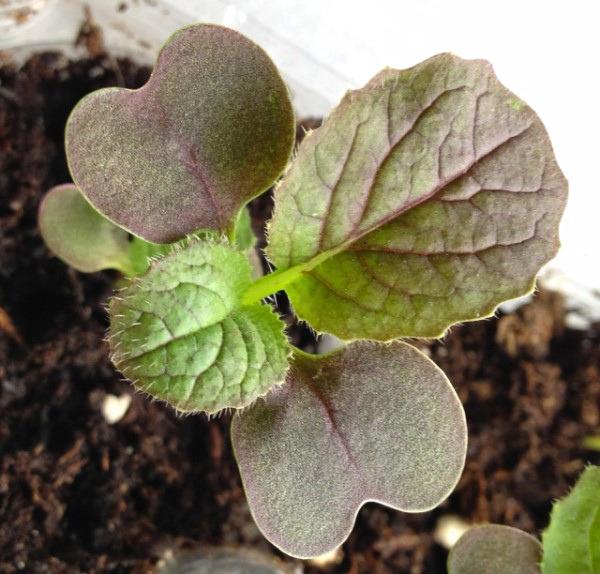
Two heart-shaped seed leaves and two true leaves on a Chinese cabbage seedling. This is the correct stage of growth for harvesting microgreens. Photo: Erica Smith, UME Master Gardener
As seeds germinate, the first leaves that emerge are the “seed leaves” (cotyledons), which are generally small and simple (rounded or heart-shaped). For most vegetables, the cotyledons emerge as a pair, followed by the first “true leaves” that have a shape and color closer to the leaves of the adult plant.
Microgreens are fast-growing, closely spaced vegetable seedlings harvested and eaten at the true leaf stage. They can be grown from April to October outdoors and year-round indoors. Gardeners often grow these colorful and healthful microgreens under grow lights in a kitchen, dining room, or basement.
Harvested microgreens include stems, cotyledons, and emerging true leaves. They are less leafy and more crunchy than plants harvested at the baby greens stage. Most of the flavor is in the leaves, not the stems, although keeping the stems helps with harvesting and adds texture and visual interest to the dish.
Typical plant size at harvest
Comparison of growth stage and harvest size for vegetable greens
Growth stage
Height
Days after sowing
Microgreens
2 to 3 inches
7 to 21
Baby greens
4 to 6 inches
21 to 40
Mature greens
over 6 inches
40 to 60
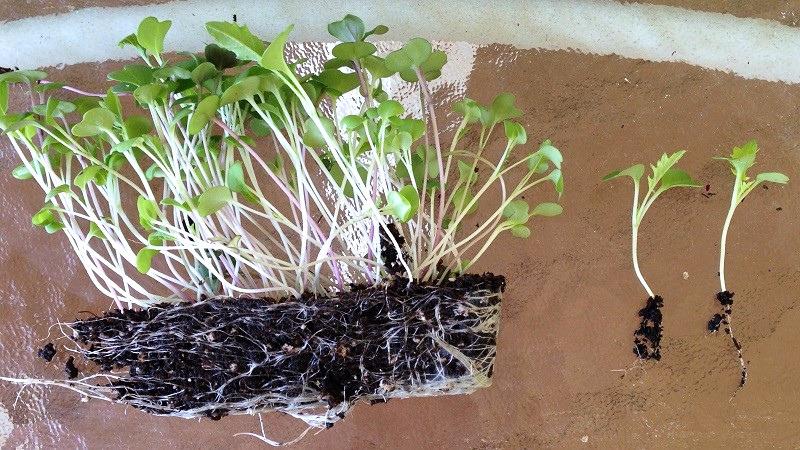
Root growth on Asian leafy green microgreens at harvest time, 12 days after planting. Photo: Jon Traunfeld, University of Maryland Extension
Benefits of microgreens
Researchers at UMD and elsewhere have learned that microgreens are higher in vitamins and phytochemicals than their mature counterparts. The content of major and minor nutrients and bioactive compounds (mostly phenolics) varies greatly between crops and is affected by environmental factors: light intensity, potting mix (growing media) nutrient content, and harvested greens storage conditions. For example, a higher light intensity increases the plant’s phenolic compound content.
Additional microgreens advantages
Fun and easy to grow, they are a good way to introduce kids to gardening.
They have a quick turnaround of edible greens in small spaces.
Microgreens can be expensive to buy, but you can grow them yourself for half the price.
They are nutritious and versatile in the kitchen, with vivid colors, a tender texture, and intense flavor.
Suitable vegetables for microgreens
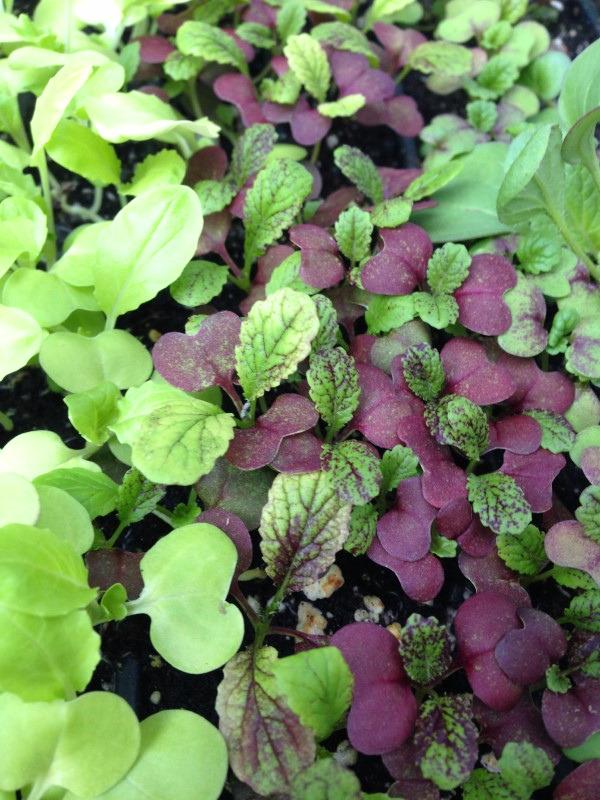
Magenta spreen (beet family) adds color to microgreen mixes. Photo: Jon Traunfeld, University of Maryland Extension
Two plant families are especially well-suited for microgreen use:
Amaranth family (Amaranthaceae), which includes beets, Swiss chard, leafy amaranth, and magenta spreen
Cabbage/mustard family (Brassicaceae), which includes kale, cabbage, radish, mustard, arugula, mizuna, and komatsuna
Cabbage family plants germinate and grow faster than the beet family plants. Cilantro and basil (both slow-growing) and peas, lettuce, onions, carrots, and lots of other herbs and vegetables can be grown for microgreens.
Supplies for growing microgreens
To grow microgreens, all you need are seeds, reusable food-grade containers or planting trays (also called “flats”), growing media, water, heat, and light for quick germination and growth.
Seeds
Save money by buying non-hybrid seeds. Shop around and buy in bulk if possible, as long as the seeds will be sown within three years. Seeds sold in 1/32 ounce packets can cost 30 times more per seed than quarter-pound bags.
Soaking certain seeds in water for 6 to 12 hours will speed up germination; these include pea, sunflower, corn, garbanzo bean (chickpea), beet, Swiss chard, cilantro, mung bean, and buckwheat.
Containers
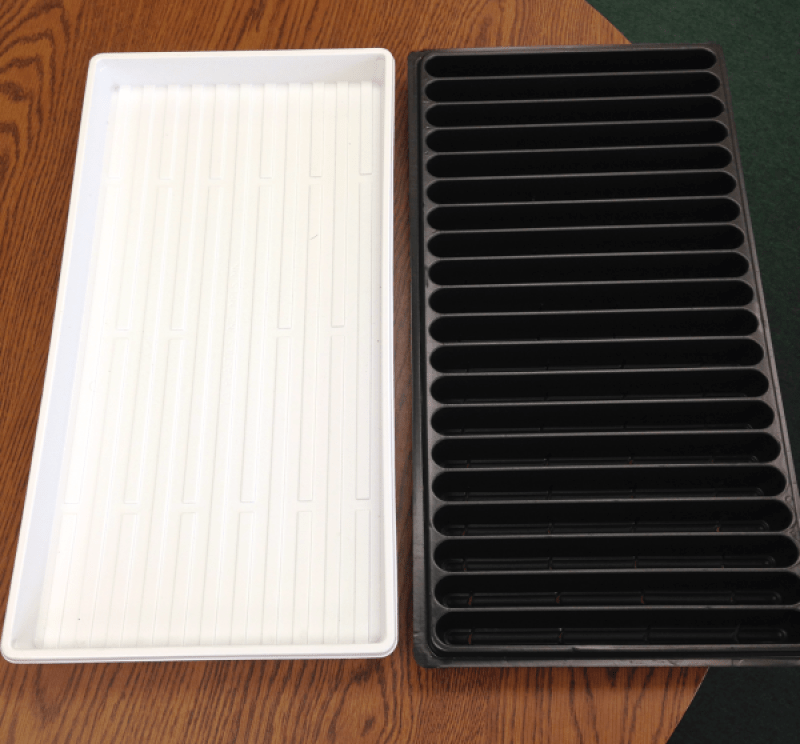
Commercial microgreens trays: a divided tray (right) is filled with media and sown seed, then put into the other undrained tray (left). Photo: Jon Traunfeld, University of Maryland Extension
Use shallow containers for ease of harvest.
Plastic food containers and standard greenhouse flats (10 inches wide by 20 inches long) work well, as well as special microgreens trays.
A standard design for commercially-available microgreens trays is a set of two shallow plastic trays. One is divided into channels that run the length of the tray which holds potting mix and seeds; it has drainage holes. It is placed into the other tray, which has no drainage holes since it acts as a water reservoir. Careful watering is required to prevent saturation of the potting mix.
You can grow microgreens hydroponically with single-use mats made from natural materials like hemp, wood fiber, coconut coir, bamboo, or jute. The pre-cut mats take the place of potting mix for the roots, and are sized to fit inside a standard greenhouse flat. Seeds germinate on top of the mat and send roots into the material. Reusable silicon mats are also available.
Growing media
Growing media has many alternate names, such as “potting soil,” “planting/potting mix,” and “container substrate.” Media should not be confused with true soil, which contains mineral components like sand, silt, or clay. Since container media does not contain soil (despite “potting soil” being a widely-used product label), they are categorized as “soilless.”
Use any lightweight soilless mix in the container or tray. Soilless mixes usually contain several ingredients, such as sphagnum peat moss, coconut coir, vermiculite, perlite, rice hulls, pine bark, and compost.
Save money by mixing high-quality, screened, plant-based compost in equal amounts (50:50) with commercial potting mix. Avoid using garden soil (taken from the ground); it’s too dense for growing microgreens and baby greens indoors in containers.
Regardless of the media type used, no fertilizer is needed. Seeds contain the necessary nutrients for initial growth, and they are harvested before they run out.
Screen and reuse growing media after harvest and any remaining roots dry out. Refresh in equal amounts (50:50) with new potting mix for the next sowing.
Sowing seeds for microgreens
Seeds for microgreens are sown more densely than seeds planted for crops that will fully mature, because seedlings are harvested before crowding causes too many problems. Due to this quick turn-around, no thinning (removing excess seedlings to give plants space) is needed.
It can be difficult to see dark-colored seeds; practice sowing seeds evenly since you might not be able to see where they land on dark potting mix.
It’s best not to mix species because of varying germination and growth rates.
Examples of approximate seed counts for three crops with different seed sizes
Crop
Seeds per ounce
Seeds per gram
Seeds per tablespoon
Beet
1,500
53
800
Broccoli
8,000
281
3,000
Mustard
15,000
530
6,500
Sowing steps
Fill a shallow container or tray with moist soilless growing media to a depth of 1 to 1½ inches.
Sow seeds thickly and evenly by weight, by volume, or estimated by eye. Sample techniques:
Space seeds 3/16-inch to ¼-inch apart, or about 5 seeds per linear inch of media.
Broadcast seeds evenly over the media surface at a rate of about 1 tablespoon of seeds (about 10 to 15 grams) per greenhouse flat (10 inches by 20 inches). Depending on the size of the seed, a standard-sized tray (flat) can accommodate 1500 to 4500 seeds.
Gently press seeds onto the media with your hands or a block of wood.
Caring for microgreens
As with outdoor plants, growing conditions are important for plant health and harvest potential for plants grown indoors. Key factors are light, temperature, moisture, and airflow.
Light
Light from a sunny window may suffice in some cases, but microgreens generally grow best under grow lights. Fluorescent or LED grow lights can be used as the only light source or as a supplement to sunlight (to extend the length of the day). The total exposure to light from any source should be about 16 hours each day. How far to put the lights above the plants will depend on the fixture’s intensity, but 6 to 12 inches above the foliage is typical.
Lettuce, arugula, mustards, and Asian greens will grow acceptably well in less-than-ideal levels of light.
Use an outlet timer to program the on and off times for the light. Programming the lights to run at night can save money since electricity is priced lower. LED lights also use less energy (to produce the same amount of light) as fluorescent lights.
The selection of a grow light doesn’t have to be complicated or expensive. If you want to learn more about the technical specifications used in grow light descriptions and packaging so you can make product comparisons, explore the Maryland Grows blog article An Introduction to Gardening Under Lights.
Temperature
After sowing, cover the container with plastic or another container to trap warmth and humidity to speed up germination. Excluding light for a few days after germination (giving the seedlings a “blackout period”) will cause the stems to lengthen, making harvesting easier.
Microgreens will germinate and grow well from 70 to 75°F. Cabbage family plants germinate rapidly (in about 36 hours) at 72°F.
Moisture
Tap water is fine for watering. Mist the seeds for the first few days to keep the media surface moist, then water from the bottom (by placing a container or tray into a pan of water to absorb it through the drain holes) or from the top.
Keep the growing media moist but not saturated.
Airflow
Ensure good air circulation to discourage plant diseases. A gentle breeze from a nearby fan can keep air moving around the dense cluster of plants.
Periodically vent any tray or container covers used to boost humidity so the extra moisture doesn’t encourage mold.
Harvesting microgreens
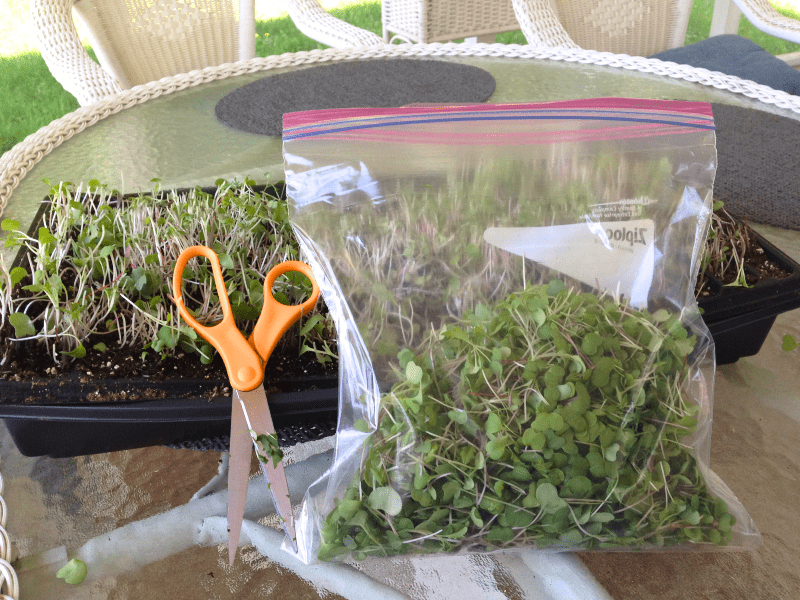
Cut the stems off just above the top of the media (the “soil line”) when the true leaves have expanded. Use clean, sharp scissors or a knife.
Rinse harvested microgreens with water, pat dry, and use right away or refrigerate for up to 10 days.
Wash and re-use the trays and containers. (The seedlings will not regrow.)
Plant the next batch of seeds in fresh growing media, or mix old and new growing media together in a 50:50 ratio before planting.
As an example of harvest potential, 1 tablespoon of arugula seeds sown in a 10-inch by 20-inch tray will produce about 8 to 12 cups of microgreens.
One-time harvest of cabbage family microgreens 14 days after sowing. Photo: Jon Traunfeld, University of Maryland Extension
Culinary use
Fresh microgreens have a wide variety of uses: in wraps, paninis, and sandwiches; in soups; in omelets and frittatas; sprinkled on salads or burgers; incorporated into pesto or nutritional smoothies; as garnishes for grain and pulse (lentil/pea/bean) dishes; chopped in dips; as cocktail garnishes; or eaten raw by themselves.
Baby greens
You can grow baby greens year-round with supplemental light. Cut to harvest the plants when baby greens reach 4 to 6 inches tall. They will regrow and can be harvested 1 to 2 more times. Thin plants as they grow after germination to achieve about a 2-inch spacing between plants.
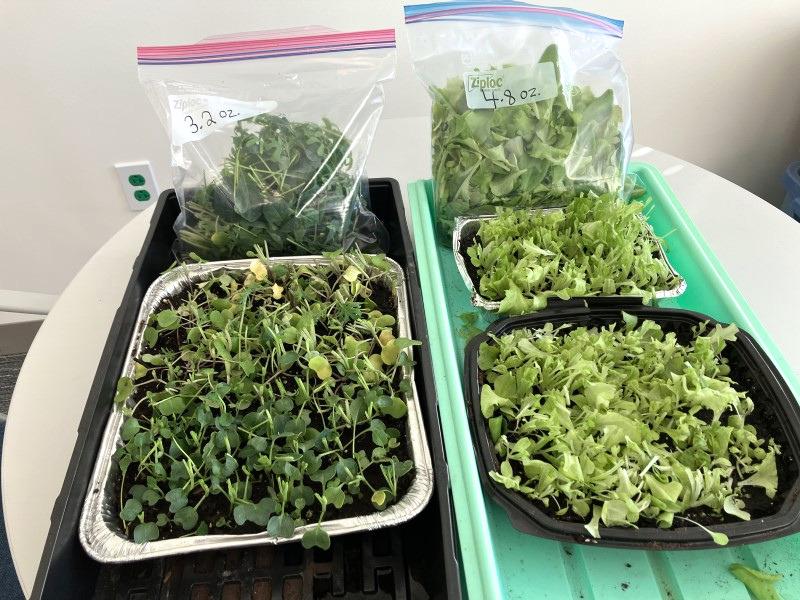
The first harvest of lettuces grown in repurposed food containers under an LED grow light. A second harvest was made three weeks later. Photo: Jon Traunfeld, University of Maryland Extension
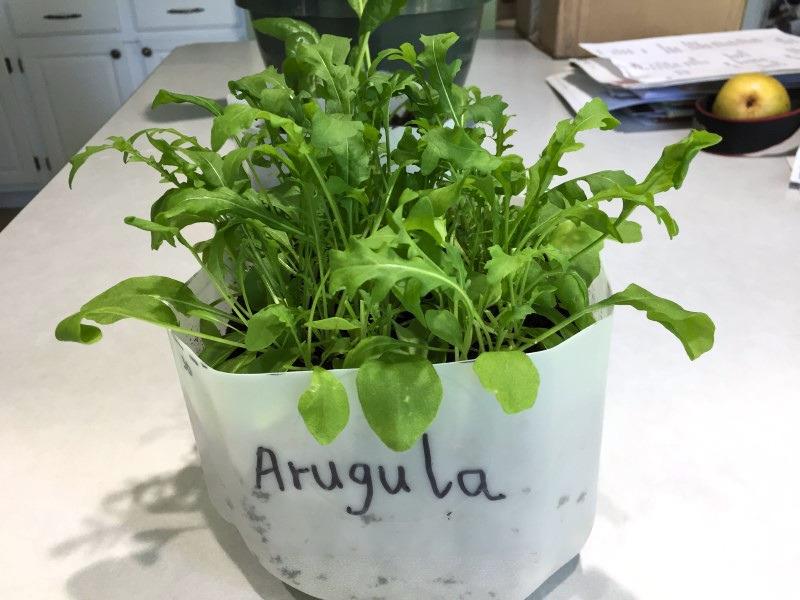
Arugula grown to produce transplants indoors under supplemental lighting. Excess plants were allowed to grow and were harvested as baby greens. Photo: Jon Traunfeld, University of Maryland Extension
Harvesting baby greens in a classroom for a school salad project. Photo: Alan Caro, Prince George’s County Public Schools
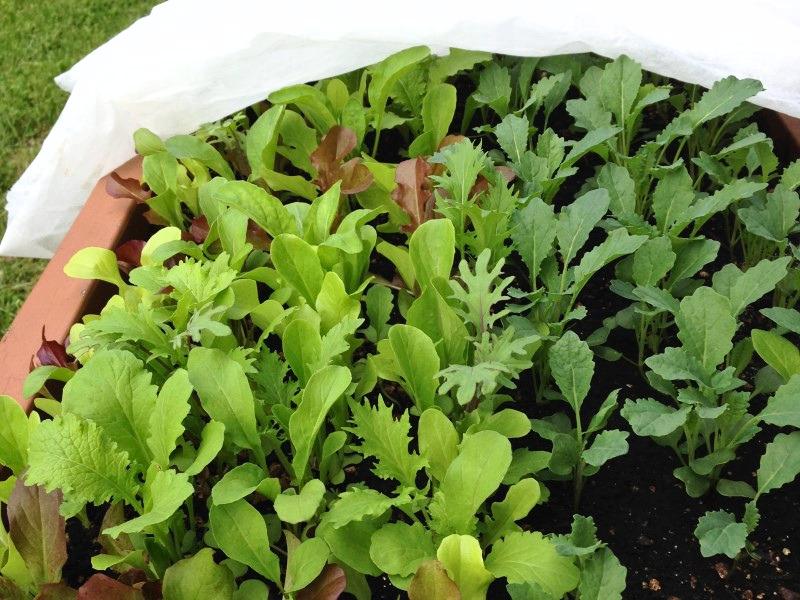
Baby greens about 4 to 6 inches tall and ready to be harvested, grown in an outdoor Salad Table. Photo: Jon Traunfeld, University of Maryland Extension
Author: Jon Traunfeld, Extension Specialist (retired), Home/Community Food Gardening, Spring 2019. Revised March 2026. Revision reviewed by Miri Talabac, Lead Horticulture Coordinator, HGIC. March 2026.
Copy editing by Nancy Klein, Maryland Master Gardener, March 2026.