Evaluate site conditions to determine if they will support thriving turfgrass. Submit a soil sample for testing and assess sunlight levels and soil traits.
Decide what and when to plant: Both cool-season and warm-season turfgrass can be grown in Maryland. The ideal planting time depends on grass type: cool-season in early autumn and warm-season in late spring.
Decide how to plant: sowing seed, laying sod, or planting sprigs or plugs. Each approach has advantages and disadvantages.
Develop a plan to adjust site conditions (if needed) before planting, to care for the grass after planting, and to deal with weeds.
Consider lawn alternatives in areas where existing conditions do not support vigorous growth or where a high tolerance for foot traffic is not required.
Creating a lawn from scratch
A new lawn can serve as a groundcover for bare soil after construction, or replace a degraded existing lawn or other landscape features. While lawn alternatives can be more sustainable and support more wildlife (like pollinators), in some cases the high tolerance of turfgrass to wear-and-tear from human or pet foot traffic is more desirable.
Evaluating site conditions
Sunlight: Full sun is best, with 6 or more hours of direct sunlight after any nearby trees leaf-out for the season. Some turfgrass types tolerate partial shade, such as a few hours of direct sun interrupted by a tree canopy or building shadow. No lawn grasses thrive in areas that receive little direct sun.
Soil drainage and moisture: Avoid locations that collect or receive excess water and drain slowly, since this will stress or kill turfgrass roots. While established lawns can tolerate some drought, they grow best in soils that are neither too dry nor too wet.
Rain or irrigation water should not puddle on the soil surface for long periods (24 hours or more). Low-lying areas that collect water may be better converted into rain gardens.
Tree roots compete for moisture and their canopies block rain. Although irrigation can help, it is not a sustainable solution and will not compensate for the additional problem of not enough sunlight reaching the grass.
Compacted soil from regular foot traffic drains more slowly and can resist absorbing moisture once dry.
Soil quality: Measure the soil’s acidity level (pH), nutrient profile, and organic matter content by submitting a sample for testing. Turfgrass is adaptable, but grows best when conditions meet its needs. Laboratory soil tests are more thorough and accurate than do-it-yourself home test kits.
Choosing how and when to plant
The decision between planting seeds, sod, plugs, or sprigs comes down to budget, labor, availability of materials, and patience for the time it takes to establish. Some turf types are only widely available in one form. To accommodate different site conditions, usage needs, and budgeting, the entire lawn does not need to be planted the same way. For example, sod can be used for areas with high visibility that require faster establishment while seed is used for areas where aesthetics or speed are less critical.
Most Maryland lawns are dominated by tall fescue; this and other cool-season turfgrasses are sold as either seed or sod.
Comparisons between seed and sod
Seed
Sod
Potentially a wide range of cultivar choices, and easier to custom-blend for specific site conditions
Limited range of cultivar choices, though certified sod contains desirable cultivars
Ease of application with handheld or walk-behind equipment
Heavy and labor-intensive to transport and lay in place
Easy to accommodate irregular lawn shapes (angles or curves)
Requires cutting to fit standard rectangular sod pieces into curved or angled lawn areas
Shorter window of opportunity to sow so grass matures fast enough to tolerate extremes of heat or cold
Longer window of opportunity to install since grass is more mature; can be planted any time the ground is above freezing and daytime temps are below 90°F
Risk of weed seed invasion during germination and establishment
Few weed invasion problems after installation, if the turf remains healthy
Risk of soil erosion during germination and establishment
Immediately reduces soil erosion risk after installation
Takes time to establish, around 4 to 6 weeks after sowing
Establishes faster since only root growth is needed, typically 3 to 4 weeks after laying
Often available for purchase, although germination rate decreases with storage time
Highly perishable and only available for purchase for a limited time
Warm-season turfgrasses are usually sold as plugs (zoysia) or sprigs (bermudagrass), but may occasionally be available as seed or sod. When compared to sod, the advantages and disadvantages between seed, plugs, and sprigs will overlap since plugs have a limited root system and sprigs have no or few roots. Starting zoysia from seed is challenging and not recommended because of high cost, limited availability, and unreliable germination rates.
When to plant
Cool-season turfgrass is best planted in late summer to early autumn (mid-August to mid-October). It takes about 2 weeks for the seed to germinate, and killing frosts are possible in November that can harm young seedlings. Spring planting (March into early April) is more challenging than fall planting, though laying sod in spring will be easier than getting seed to germinate and establish successfully.
Warm-season turfgrass is planted in late spring and early summer (mid-May into June).
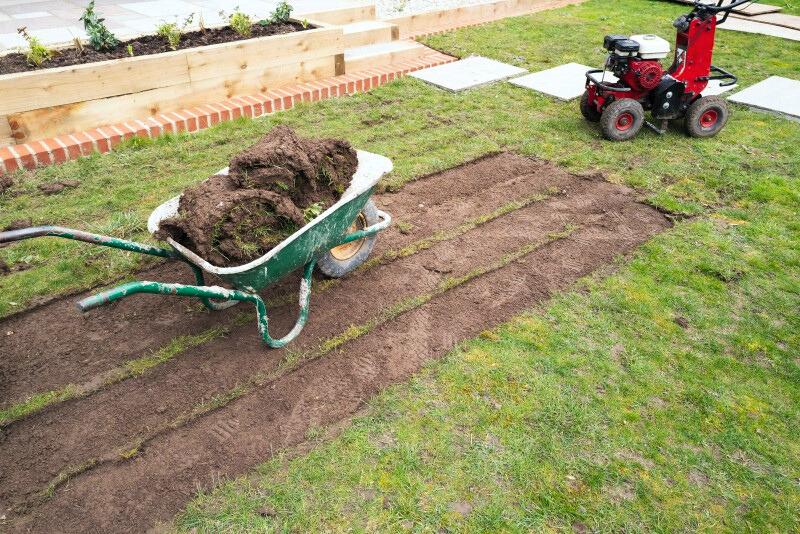
Preparing the soil
Level uneven soil before planting for a more uniform lawn. Photo by Adobe Stock
Start with weed-free, bare soil.
Regrade as needed to level-out mounds and ruts in the soil, and remove any loosened stones. Use good-quality topsoil if the existing soil is not enough to fill-in low points.
Do not create a slope toward a building. An ideal slope away from buildings should have a 1-2% grade (1¼- to 2½-inch drop every 10 feet).
Do not regrade over tree roots, because minor soil depth changes can contribute to tree decline. If shallow roots break the surface and are a trip hazard or obstacle to mowing, plant an alternative groundcover or mulch that area instead.
Incorporate amendments if the soil quality is poor from compaction or nutrient deficiencies, or has an unsuitable pH. Blend additives with the soil using a rototiller that mixes soil 4 to 6 inches deep. Do not till in wet conditions, which degrades soil structure. A garden fork or gravel rake can be used to manually mix amendments into small areas.
Apply organic matter (compost) if the current levels in the soil test results measure less than 3%. New home sites typically have topsoil removed during construction (topsoil contains more organic matter than subsoil). Machinery and foot traffic compact soil, which worsens drainage and harms turf roots. Organic matter in the soil helps to alleviate compaction.
Apply 1 to 2 inches of compost to the soil surface, equivalent to 3 or 6 cubic yards (respectively) of compost per 1,000 square feet of soil surface.
Thorough mixing of compost into the soil is essential to keep drainage uniform.
Apply fertilizer as determined by soil test results in compliance with Maryland’s lawn fertilizer law. “Starter” fertilizer formulations that contain phosphorus (P) can be used for new lawns or when test results measure low levels. If seeding fescue in the spring, use a starter fertilizer with a nitrogen (N) content that is approximately 50% in slow-release form (water-insoluble).
Apply lime to raise pH if it measures below 5.5; apply sulfur to lower pH if it measures above 7.0 (this is uncommon).
Mildly acidic soil in the 6.0 to 6.8 pH range is optimum for turf growth; no lime is needed in that case. Tall fescue in particular will grow well in the 5.8 to 6.5 pH range.
Soil testing labs often provide application rate recommendations if either amendment is needed.
Use caution around tree and shrub roots that will infiltrate the lawn or receive runoff from it. Many widely-grown tree and shrub species grow best in acidic soil and should not be limed.
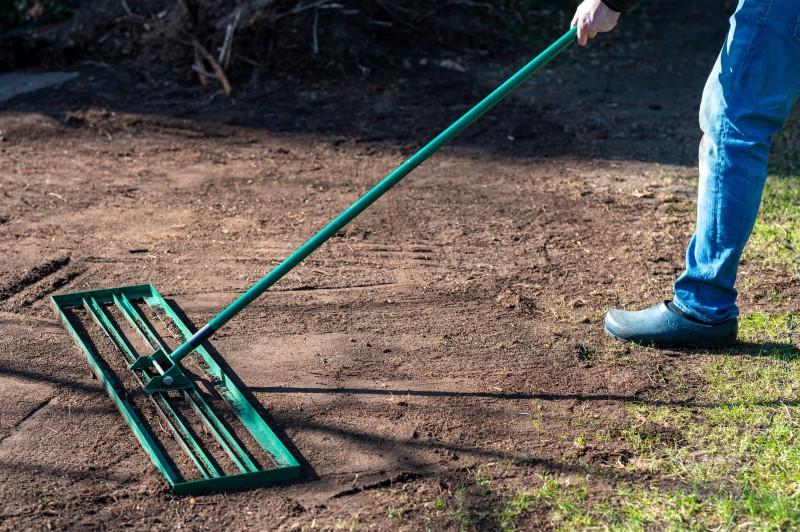
Touch up the grading as needed by raking or lightly using a lawn roller over the soil to create an even surface (the “seed bed”).
Planting seed, sod, plugs, and sprigs
Press sod onto the soil for good root contact. Photo by Adobe Stock
Seed and sod are laid on the soil surface and lightly pressed down to make good contact with the soil. Plugs must be planted, and sprigs are pushed partially into the soil (like a cutting) to root.
Seeding rates per 1,000 square feet of soil surface
Turf Type
Seed Application Rate
Tall fescue
6 to 8 pounds
Kentucky bluegrass
2 to 3 pounds
Fine fescue
4 to 6 pounds
Zoysia
1 pound
Bermudagrass
1 pound
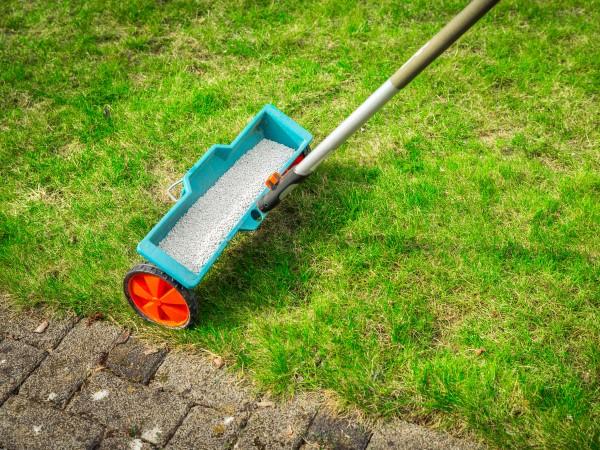
Applying seeds evenly
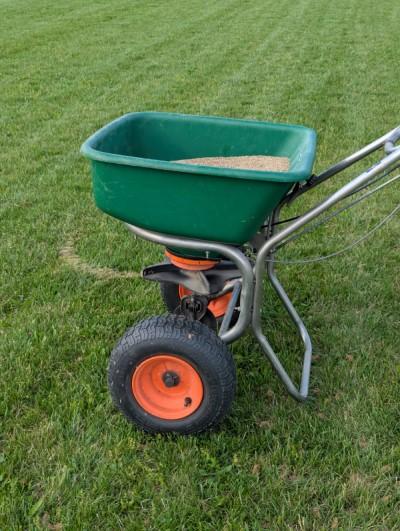
Broadcast spreader applying grass seed. Photo: Miri Talabac, University of Maryland Extension
Divide the total amount of seed for the entire lawn area into two equal parts. Apply one half in one direction (for example, north-south) and the other half in the opposite direction (east-west). When using this two-pass technique, be sure to adjust the settings on a spreader to apply the seed at half the recommended rate for each direction.
Seed spreaders consist of a basin with an adjustable gate in the bottom where the seed falls through. Spreaders can be wheeled walk-behind models or handheld. Drop spreaders let the seed fall straight down onto the ground between the wheels, and may be easiest to use in small spaces or curved lawn areas. Broadcast (rotary) spreaders use a spinning disc below the falling seed to fling it out to a wider area. The rate of spin depends on either how fast you walk or how fast you crank a handle on a handheld model. Calibration settings for how fast seed is released vary from one brand of spreader to another; refer to the user manual.
Slit-seeder machines cut grooves into the soil where seeds are dropped. Due to their bulk and weight, lawn companies, rather than home gardeners, typically use these machines.
Drop spreaders deposit the seed directly below the spreader. Photo by Adobe Stock
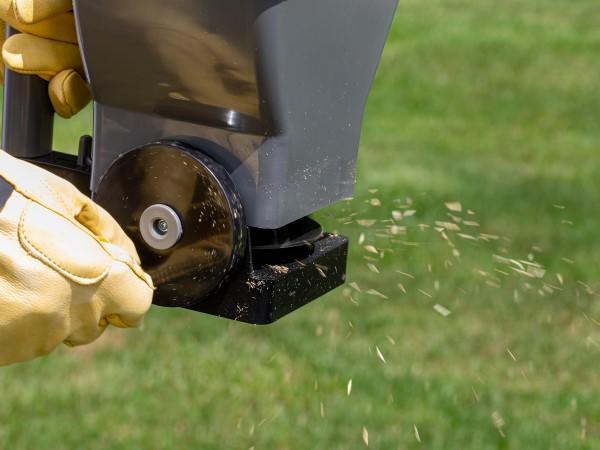
Handheld rotary spreaders fling the seed as you rotate the handle. Photo by Adobe Stock
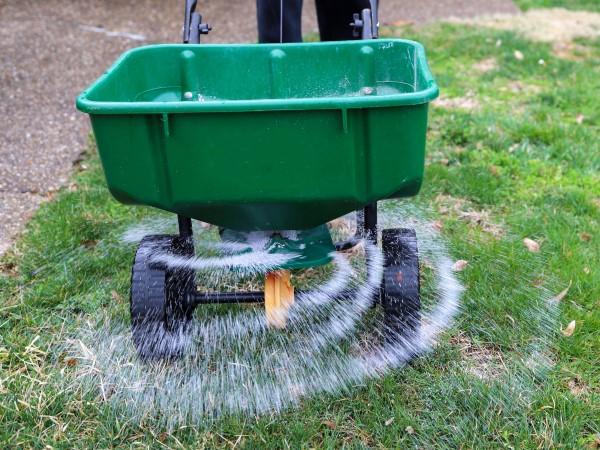
Broadcast spreaders fling the seed as you walk. Photo by Adobe Stock
Covering seeds
Raking seeds into the soil is not necessary, though lightly covering them can improve germination rates. Use only about ¼ to ½ inch of topsoil or good-quality finished compost on top of sown seeds. Alternative materials include sheets of excelsior (finely-shaved wood), paper-based pellets that absorb moisture, or a scattering of straw that is thin enough to keep some of the soil surface visible. Avoid using any seed covering material with interwoven mesh or plastic that could entangle wildlife and won’t biodegrade.
About 80 to 100 pounds of straw scattered over 1,000 square feet is sufficient. (The average straw bale may weigh 35 pounds or more, depending on moisture content.) Scattering straw on top of a compost topdressing will discourage erosion until the new grass has established. Don’t confuse straw with hay, which can contain weed seeds.
To speed up germination and hide seeds from hungry birds, you could experiment with using a lightweight grade of floating row cover (reusable) or fairly open-weave cheesecloth (biodegradable). The cover helps to trap humidity and a few degrees of warmth on cool nights. Water passes through the cover, although the edges will need tacking down with landscape staples to resist wind. Remove the cover as soon as the young grass starts pushing up against the fabric. In comparison, a seed cover of straw, excelsior, or cotton cheesecloth will biodegrade and can be left in place.
Stray weed seedlings of cereal grains (barley, oats, wheat, or rye) from contaminated straw are not a serious problem. Their rapid germination helps to resist erosion and the plants will soon die since they are not tolerant of mowing.
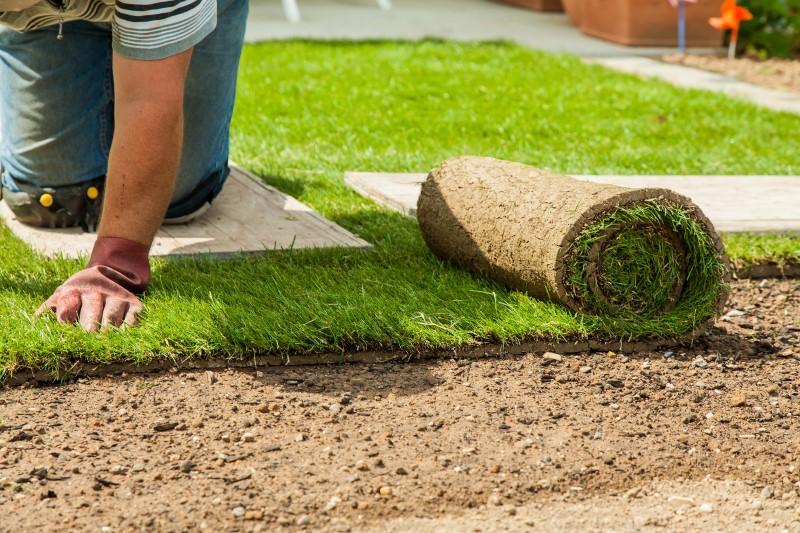
Laying sod
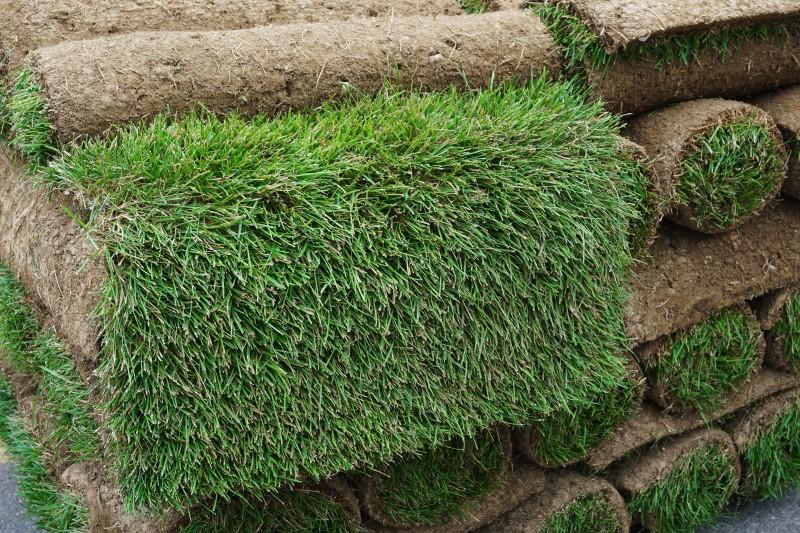
Sod rolls are typically sold by the pallet. Photo by Adobe Stock
Sod is unrolled as it is laid. Photo by Adobe Stock
A standard roll of sod covers approximately 10 square feet, although the length and width dimensions may vary. Depending on soil moisture and thickness, sod can weigh 20 to 40 pounds per roll.
If possible, inspect the sod before delivery. Sod should be deep green and evenly moist, not soaking wet or yellowing, which may indicate improper storage. Sod should be dense and well-knitted so that it can be cut into strips and handled easily.
Install sod promptly after delivery. With only about 1 inch of attached root and soil depth, sod is highly perishable; do not let it dry out. If rolls need to be stored for a couple of days, unstack them and lay them out flat (grass side up) in a cool, shaded area, and irrigate as needed.
Lightly moisten the planting site before installation.
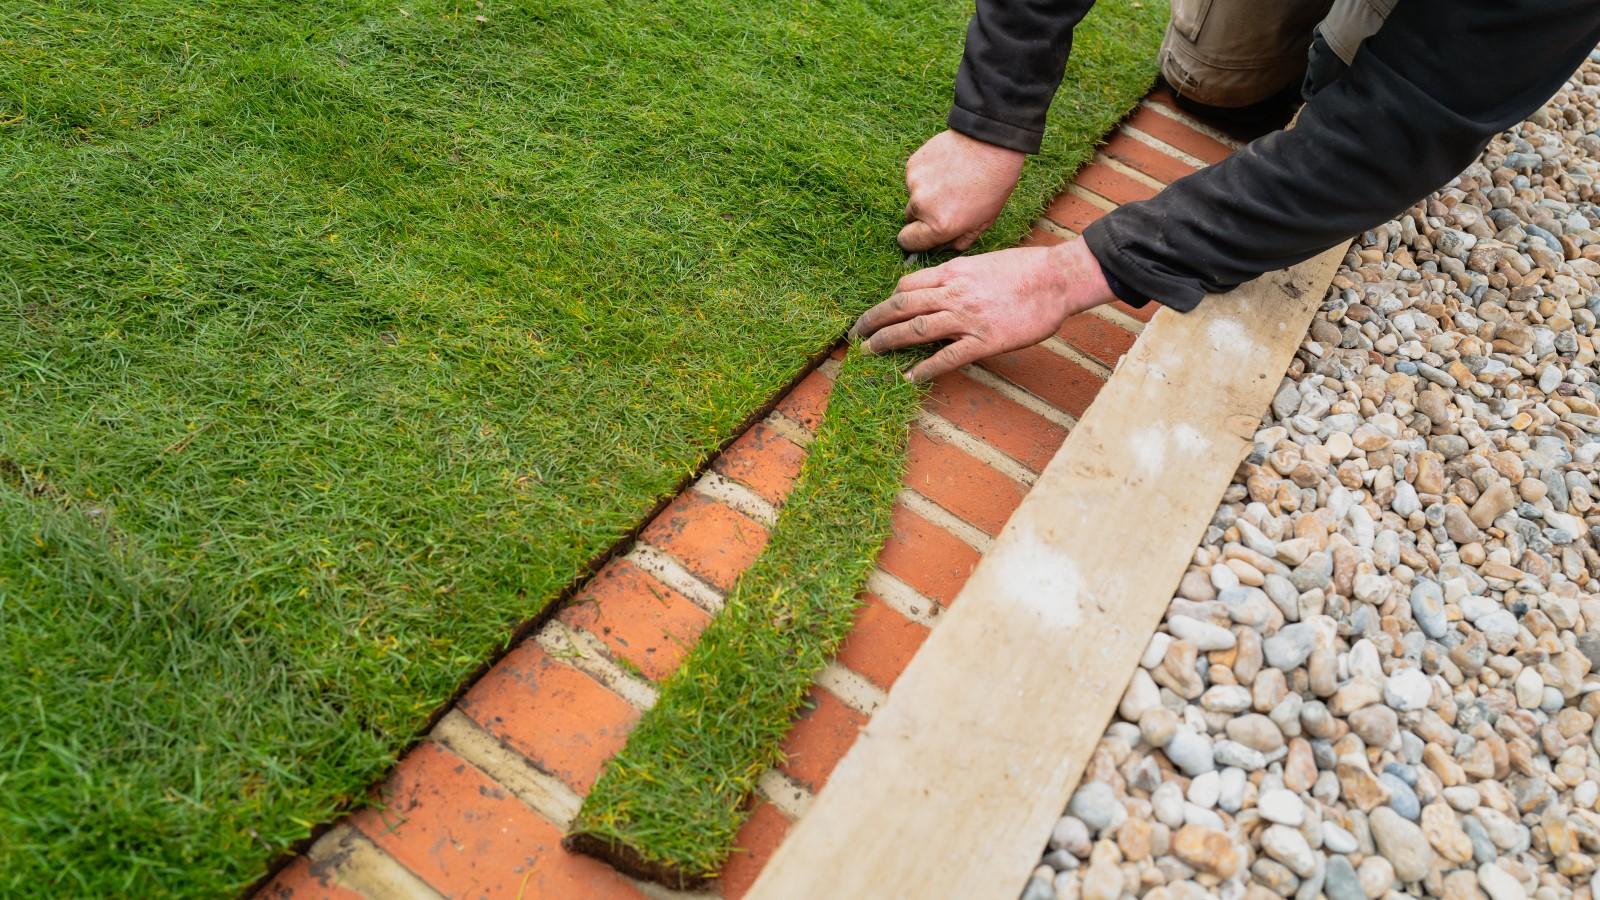
Use a straight-edged guide when laying the first pieces, such as a sidewalk or driveway. On sloped sites, the sod should be laid perpendicular to the slope and secured to the ground with stakes or landscape pins until the grass roots in.
Lay a strip of sod up against its neighbor but not overlapping. Gently tamp-down edges to ensure good soil contact.
To help hide seams, stagger the pieces from one row to another like brickwork. A sharp tool can cut pieces to fit irregular spaces.
Use a plank or piece of plywood to walk over newly-laid sod to avoid compacting the soil as the area is filled in.
When all pieces are laid, use a lawn roller to lightly push the pieces onto the soil surface.
Roots are typically established in 2 to 3 weeks. Check for rooting by gently lifting a corner of the sod and looking for white young roots. Resistance to a tug indicates roots are growing into the soil below. Avoid walking on the sod until it is fully rooted.
After being laid, sod can be cut to fit the space. Photo by Adobe Stock
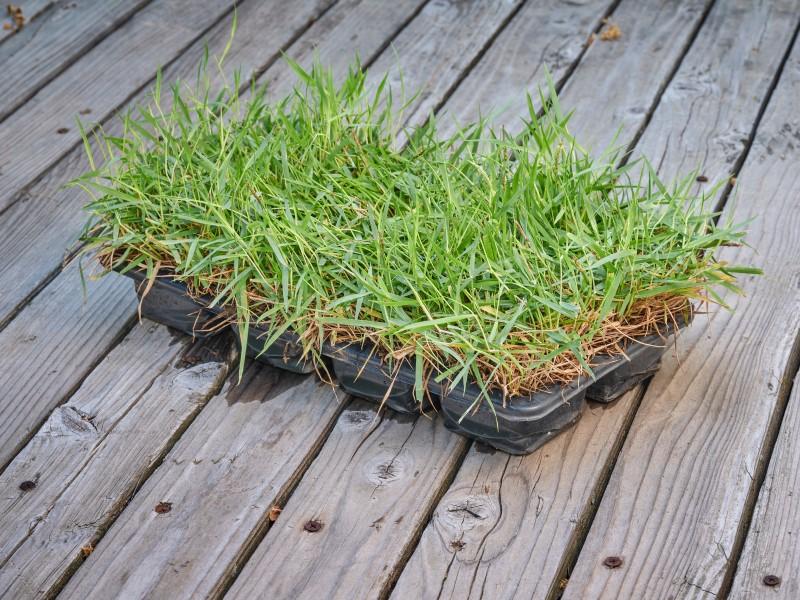
Installing zoysia plugs or sprigs
Zoysia plug tray. Photo by Adobe Stock
Zoysia plugs are fragments of sod: small clumps of grass rooted into soil. They are sold in trays that hold multiple plugs, each about 2 inches wide. Dig planting holes 6 to 12 inches apart and only as deep as the root ball. Helpful tools include a trowel, bulb planting or plugging tool, or small spade. Close spacing will require more plugs, but the new lawn will fill in faster.
Sprigs are stolon (runner) pieces about 3 inches long having at least one or two nodes (stem joints capable of growing roots and leaves). Sprigs are highly perishable and vulnerable to drying out. They establish faster than plugs, but require more effort to plant.
A portion of the sprig (at least one node) must be inserted ¼- or ½-inch into the soil to root. Use a hoe or shovel to create rows of shallow 1- to 2-inch grooves spaced 6 to 12 inches apart. Plant sprigs into the groove 4 to 12 inches apart, and press the sprig onto the ground to ensure good soil contact. About a third of the sprig should be above the soil line. Sprigging machines exist but may be hard to find.
Zoysia is primarily sold as plugs in Maryland; sprigs may be harder to find.
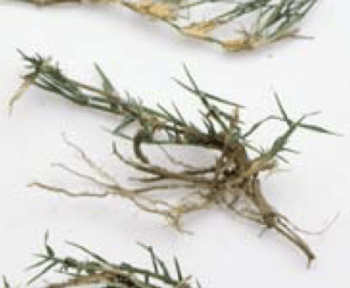
Installing bermudagrass sprigs
Bermudagrass sprig. Photo: Bob Morris, University of Nevada
Sprigs are cut from bermudagrass sod stolons and have few or no roots. They are highly perishable and vulnerable to drying out. Sold in bushels, the application rate is 40 to 60 springs per acre.
A portion of the sprig (at least one node) must be inserted into the soil to root, though this grass is so aggressive that the exact position of the sprig is not critical as long as part of it is buried and not covered by more than 2½ inches of soil.
Watering after planting
Oscillating style of sprinkler watering a lawn. Photo by Pixabay
New lawns are not tolerant of drying out, so they must be watered differently from established plants. Instead of periodic deep soakings, water lightly and frequently to keep the top inch of soil around the shallow roots moist but not saturated.
If irrigation is not possible, expect poorer germination, rooting, and establishment; postpone planting during a drought. Use a weed-free mulch like straw over top of grass seeds to help retain moisture, though this will not fully compensate for dry conditions by itself.
Avoid watering in the evening, since leaf drying slows overnight and wet foliage is more vulnerable to diseases.
Keeping young plants moist
Irrigate seed, sod, plugs, and sprigs immediately after planting. Apply about a ¼-inch of water each irrigation session for seeds and sprigs; plugs and sod may need a slightly heavier watering to reach the soil below.
Without rain, plugs may need daily irrigation for the first 7 to 10 days after planting. Sprigs and seedlings may need irrigation several times per day for several weeks to support root growth. Water sod regularly for the first 2 to 3 weeks after laying; it might need to be watered daily.
When conditions are windy and dry, the planted area may require several light waterings per day. Pay special attention to soil moisture on hot, breezy days when the humidity is low. Sandy soil tends to dry out faster than clay.
Reducing watering frequency over time
As seedlings mature and root growth deepens, wean the grass off that schedule and water less frequently but with a longer duration each time. Work up to applying about 1 inch of water per irrigation. The soil surface can become somewhat dry between waterings, but the top 4 to 6 inches of soil should be moist.
Start this transition once seedlings become tall enough to mow. Take into account that faster-germinating species in a seed mix, like tall fescue, will reach mowing height faster than slower species like Kentucky bluegrass. In that situation, wait for the slowest-growing species.
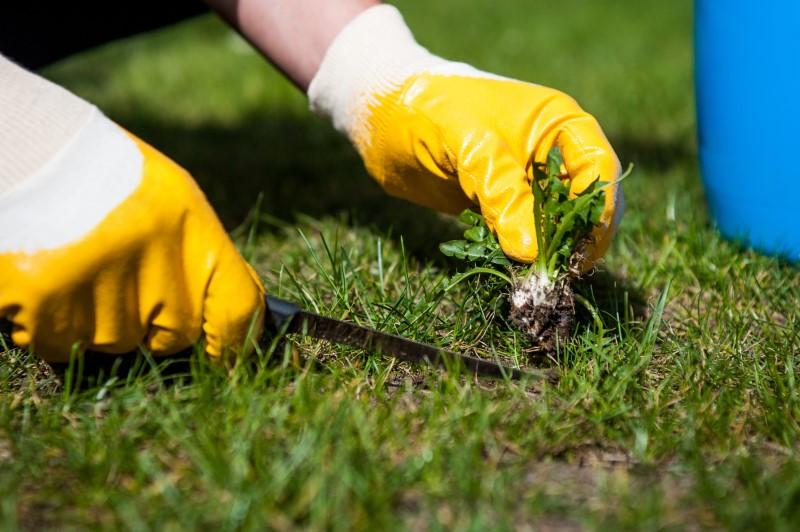
Discouraging and removing weeds
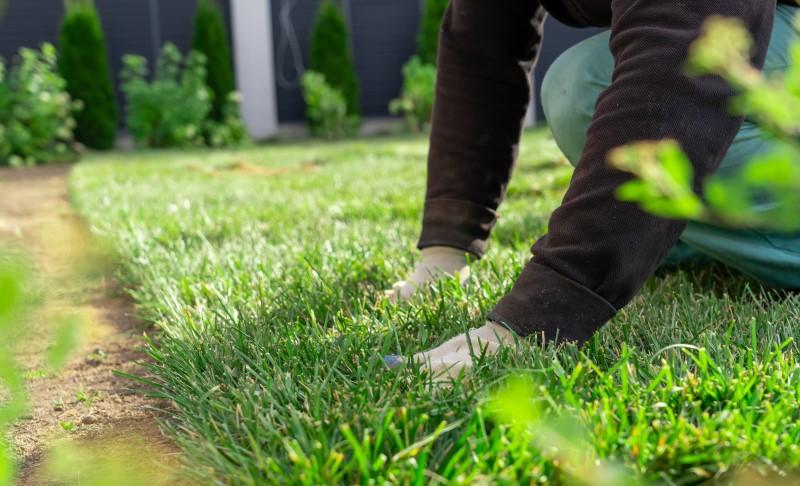
Small, scattered lawn weeds can be dug out by hand. Photo by Adobe Stock
Any plant out of place can be considered a weed. Lawn weeds are normal and to be expected, even in a healthy, well-maintained lawn. Billions of weed seeds reside in topsoil, blow in on breezes, and are carried by stormwater and animals to your landscape.
If well cared for, new sod tends to remain weed-free for the first two growing seasons after establishment. Weed seeds might sprout before turfgrass seedlings, sprigs, or plugs have filled in, since disturbing the soil to prepare for planting exposes them to water and light for germination. Competition from weeds is greatest on turf sown in early spring compared to autumn, and is the most common cause of lawn failure with spring seeding attempts.
Weed suppression options include manual and chemical methods. Where possible, remove weeds manually by hand-pulling or scraping them up with a hoe. Weeds intolerant of mowing will die back naturally after the lawn is mown several times.
Some weeds will be too difficult to remove manually, or the area to weed may be too large to manage by hand. Chemical weed removal involves herbicide (weed killer). Grassy weeds and broadleaf weeds can invade a lawn, and herbicides will target one group or both.
Pre-emergent herbicides prevent seed germination.
Once applied to the soil surface, the chemical barrier cannot be disturbed or it will no longer be effective. Plug and sprig planting must be done before making an application.
Certain ingredients may affect weed seeds and desirable turfgrass seeds. For example, applying crabgrass preventer might conflict with the ability to sow cool-season turfgrass seed in spring if the chemical stops the germination of all types of grass.
Post-emergent herbicides kill weeds that have already sprouted.
Selective herbicides target certain plants and pose less risk to others. The distinction may be between grasses and broadleaf plants, or warm- and cool-season grasses.
In general, new turfgrass should grow to a mowable height three times before applying a herbicide for broadleaf weeds. Pre-emergent herbicide for grassy weeds (such as crabgrass) should be avoided until the new turf grows to a mowable height at least four times. This ensures the new grass is mature enough to better tolerate exposure to the herbicide. Always refer to the product label for specific instructions for use.
Reduce pesticide use and avoid collateral damage to the lawn from non-selective herbicides by spot-treating individual weeds. Spot treatment only applies the chemical to the weeds, not the entire lawn.
Transitioning to routine care and lawn use
Use the information in Maintaining an Established Lawn to guide your mowing, fertilization, and watering of the new lawn once it is established (fully rooted in). Judge establishment by how resistant the roots are to pulling.
Mowing
Under optimum growing conditions, mowing typically begins 4 to 6 weeks after seeding. Ensure mower blades are sharp to prevent new grass from being shredded or ripped out of the ground. Mow the new turf when it reaches a height one-third higher than the recommended mowing height. For example, set a mower blade to a 3-inch height and mow tall fescue when the grass reaches 4 inches tall, so only a third of the grass blade is removed. As an alternative, new grass can be mowed as soon as it grows just above the target mowing height (3 inches) to help it fill in more quickly.
Fertilizing
Fertilizer applied according to soil test results during the initial seeding period is sufficient for 6 to 8 weeks. Follow-up applications can be made as needed within the parameters of the lawn fertilizer law.
Using the lawn
Young seedlings, sprigs, and plugs are easily injured. Restrict people and pet foot traffic from newly planted areas for at least a month after seeds have germinated, or until the new lawn has been mown at least twice.
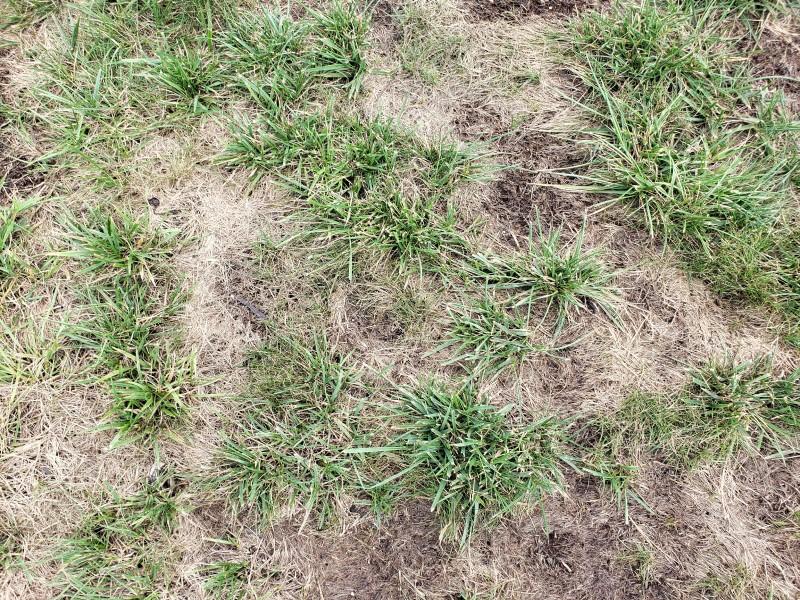
Causes of new lawn failure
Patchy growth can develop as lawns accumulate damage. Photo: Ask Extension
Proper care during the first two months of establishment is essential for healthy, dense turfgrass that is resistant to weed invasion and other problems. Impacts of climate change, including unusually warm autumn weather and fluctuating periods of wet weather and drought, make successful lawn establishment more challenging, even during the recommended seasons for lawn projects. For tall fescue lawns, overseeding in spring may be necessary for a thicker lawn if the seeds sown in autumn did not germinate or establish well.
Why do new lawns fail?
Under-watering: Compacted soil won’t absorb water quickly and can be difficult to re-moisten if it gets too dry. Soil dries out faster in low humidity and sunny, breezy, warm weather. Sandy soils dry faster than clay soils.
Over-watering or poor drainage: Too much water will stress or kill turfgrass roots, or erode ungerminated grass seed to leave bare areas. Watering late in the day risks overnight leaf wetness, which makes grass much more vulnerable to infections.
Improper mowing: Cutting the grass too short favors weeds and deprives the young grass of energy for vigorous, well-anchored root growth. Letting the grass grow too tall between mowings stresses turf since too much growth is removed at one time. Dull mower blades can tear young grass plants out of the ground and shred leaf tops, inviting infection and drying plants out.
Improper fertilization: Over-application of nutrients can kill plants or stall growth by damaging leaves or roots. Under-application slows establishment and hampers robust growth that would better out-compete weeds and tolerate weather stress.
Too much competition: Weeds and tree roots compete with turfgrass for light, moisture, and nutrients. Germinating grass seed cannot out-compete established weeds if the weeds are not removed before seeding a new lawn.
Not enough sunlight: Turfgrass shaded by trees or buildings will struggle to germinate, establish, thrive, and rebound from damage. Grass seed needs light to germinate and should not be covered with more than about ½-inch of soil or ¼-inch of compost or straw.
Poor grass quality: Using old seed (near or past the sell-by date), varieties not locally recommended, or a seed source not free of weeds can reduce germination or successful establishment. Uncertified sod could contain weeds or undesirable grasses. Sod, plugs, or sprigs that get too dry before purchase or planting may die.
Inadequate soil preparation: Incomplete blending of amendments (like compost) with the existing soil can affect drainage and moisture retention. Uneven ground will result in mowers cutting grass on the mounds too short.
Out-of-season planting: Cool-season grass seed sown outside of the ideal window of time (mid-August to mid-October) can struggle with heat, frost, or more weed growth. Warm-season grasses planted too early or too late may be chilled into dormancy or not have enough time to establish. Times of year with less than 10 hours of light per day (generally November into February) will not support grass growth for any species. The optimum soil temperatures for grass seed germination are 50 to 70°F, measured around a 1-inch depth. Ungerminated fall-sown grass seed will die over the winter (with the exception of Kentucky bluegrass).
Reducing lawn size and planting alternatives
Removing lawn using a sod cutter machine. Photo by Adobe Stock
Prioritize areas where a high tolerance to foot traffic (people or pets) is needed, since lawns are among the most resilient groundcover options for those conditions. Consider growing other species to replace the rest of the lawn. Native plants provide ecosystem support, and while they are not maintenance- or problem-free in a garden setting, a species-diverse landscape will have fewer serious or widespread issues.
Author: Miri Talabac, Lead Horticulture Coordinator, HGIC, March 2026.
Reviewed by: Geoff Rinehart, Lecturer and Turfgrass Management Advisor, Institute of Applied Agriculture, September 2025. David Clement, Ph.D., Extension Specialist in Plant Pathology, December 2025.
Copy editing by Nancy Klein, Maryland Master Gardener, December 2025.